The resulting file may be directly used as source media for installation of Mac OS into a virtual machine on VMware Fusion and on ESXi (running on Apple hardware). Using a disc image for installing Mac OS into a VM is usually much faster and more reliable than directly using the physical disc.
ISO files are particularly useful if you want to. Although, you should note that some DRM copy protection schemes won’t work with ISO files, unless you jump through additional hoops. ISO files are also great for things like providing a disc to a, or just saving a copy of a disc so that you can recreate it in the future if you need to. Windows RELATED: Windows doesn’t have a built-in way to create ISO files, although modern versions of Windows— Windows 8, 8.1, and 10—can all without any additional software. RELATED: To actually create an ISO file from your own physical disc, you’ll need a third-party program. There are lots of tools that can do this, but you need to be careful because many of them are packed with.

As always, we recommend to grab tools of all sorts. On the ISO front, Ninite includes tools like,,. Just be sure to download them through Ninite.
Some of these programs—like ImgBurn—do include junkware in their installers if you get them from elsewhere. After you choose and install one of these tools, all you really have to do is insert a CD or DVD into your PC, click the option for reading a disc or creating an ISO, and then select a location to save the ISO file. MacOS RELATED: On a Mac, you can to create images of discs.
To open it, press Command+Space to open the Spotlight search box, type “Disk Utility”, and then press Enter. Insert a disc, click the File menu, and point to New > Disc Image from [Device]. Select “DVD/CD master” as the format and leave encryption disabled. Disk Utility will create a.cdr file from the disc. On a Mac, this is practically as good as an ISO file. You can “mount” it from within the Disk Utility application by clicking File > Open Disk Image. Assuming you just want to use the.cdr file on a Mac, you can leave it as a.cdr file.
Canon easy photo print for mac. Easy-PhotoPrint EX is software that allows you to create albums, calendars, and stickers easily by using the photo that was taken with a digital camera. You can also print borderless photograph with ease.
If you want to convert it to an ISO file to use on other operating systems, you can do so with a Terminal command. Open a Terminal window and run the following command: hdiutil convert /home/username/original.cdr -format UDTO -o /home/username/destination.iso Replace “/home/username/original.cdr” with the path to the CDR file and “/home/username/destination.iso” with a path for the ISO file you want to create. In many cases, you may be able to rename the.cdr file to an.iso file and be done with it, but this method doesn’t always work. We recommend sticking with the terminal command. Linux On Linux, you can create an ISO file from the terminal or with any disc-burning utility your Linux distribution may include. For example, Ubuntu uses the Brasero disc-burning utility.
Open the Brasero Disc Burner, click “Disc Copy,” and then you can copy an inserted disc to an “Image File.” Other Linux distributions and desktops may include similar tools. Look for a CD/DVD-related utility and it should have an option to copy a disc to an ISO disc image file. Note: Brasero was removed from the default installation in Ubuntu 16.04, so you’ll need to install Brasero from the Ubuntu Software Center. Creating an ISO file from the terminal is as simple as running the below command: sudo dd if= /dev/cdrom of= /home/username/image.iso Replace “/dev/cdrom” with the path to your CD drive—for example, it may be “/dev/dvd” instead—and “/home/username/cd.iso” with the path to the ISO file you want to create. You can mount the resulting disc images with the “mount” command in a terminal or with graphical tools that basically just provide a prettier interface over the mount command.
Once you have your ISO files, you can copy them to a computer’s hard drive, store them on a USB drive, or make them available on the network. Any computer without a disc drive can read them and use them as a virtual disc.
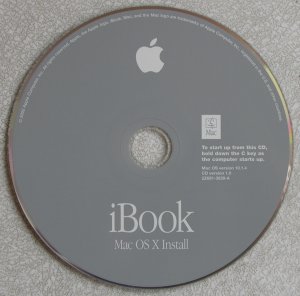
My Mac hardware doesn't seem to want to acknowledge that my burnt OS X install CDs are bootable. I am trying to install OS X Tiger (10.4) on to my Power Mac G4. I am trying to use a set of burnt CDs created from images (.dmg) that I made a few years ago. I burned the images using UltraISO Premium 9.3.2 installed on my HP Laptop running Vista Home. I have had countless problems trying to get Mac hardware to read burnt OS install discs. After weeks of trying I managed to get Xubuntu Linux on to iBook Clamshell G3's by using a bootable flash drive.
Snood v1.1, v2.1 and v3.0 are included together. What is Snood?  Snood is a puzzle game which emphasizes thought rather than reflexes.
I have tried using the key commands listed below to try to boot the 1st Tiger install CD, but none of them have provided any resolution. C Option Option, Command, Shift and Delete (Option, Command, o, and f) + (0 > boot cd) (Option, Command, o, and f) + (0 > boot cdrom) Is there a way to get the CD to be bootable? Is there any other way boot the Tiger install? Can it be done from a CD image stored on an external USB hard drive? If so, what format should the image be in (img/dmg/iso/other)? How should the drive be formatted (HFS/HFS+/FAT/FAT32/other)? Thanks for any assistance you can provide.